问题虽小,你可知晓?
在iOS开发过程中,你是不是经常遇到这样的问题:有些UI效果,明明可以通过属性配置可以实现,却因为不知道而大费周章;某个功能明明实现过,但因为忘记了如何实现而重来一遍。
然而,这些问题往往都是些小问题,明明不应该花费那么多时间,但是我经常被这折腾的够呛。所以,我决定记录一下。以备下次再用。
- UIBar
- UINavigationBar
- UITabBar
- UITableview
- 文本
- 键盘
还记得当初iOS7刚出来的那会儿,对于扁平化与拟物化之间争议的血雨腥风。然而现在大家都已经习惯了扁平化的设计,看到拟物设计时,倒是要吐槽一下了。
对于工程师而言,来不及感叹世事变化太快,这些都是设计师们的事儿,我们还是老老实实做好iOS6、iOS7的适配工作吧。现在扁平化大行其道,我们需要跟iOS6系统本身自带的很多效果say goodbye。
UIBar
UINavigationBar,UITabBar,UIToolBar都是UIBar,下面我们看看iOS6与iOS7之间的差别。
很多时候,iOS6自带的那种拟物的立体的效果,会让整个页面非常不协调,我想每位iOS开发工程师都懂的。所以,我们需要把它“拍扁”。
拍扁有两种方式,一种设置背景色,一种设置背景图片。
1.设置背景色:
首先定义一个UIColor的宏
1 | #define ColorWithHexValue(hexValue) [UIColor colorWithRed:((float)((hexValue & 0xFF0000) >> 16))/255.0 green:((float)((hexValue & 0xFF00) >> 8))/255.0 blue:((float)(hexValue & 0xFF))/255.0 alpha:1.0] |
然后设置UIBar的背景色,需要区分系统版本
1 2 3 4 5 6 7 8 9 10 | if (NSFoundationVersionNumber > NSFoundationVersionNumber_iOS_6_1)
{
[[UINavigationBar appearance] setBarTintColor:ColorWithHexValue(0x289BBE)];
[[UITabBar appearance] setBarTintColor:ColorWithHexValue(0x289BBE)];
}
else
{
[[UINavigationBar appearance] setTintColor:ColorWithHexValue(0x289BBE)];
[[UITabBar appearance] setTintColor:ColorWithHexValue(0x289BBE)];
}
|
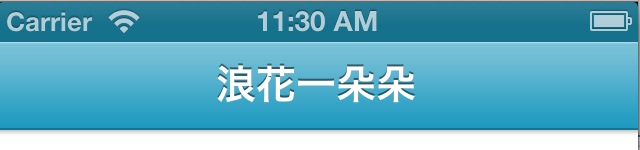
iOS6拍扁后的效果图:

2.设置背景图片:
1 2 3 4 5 6 7 8 9 10 11 12 13 14 15 16 | //--- 创建一张图片 --- //--- 此方法可以添加到UIImage的Category方法中 --- CGRect rect = CGRectMake(0, 0, 1, 1); UIGraphicsBeginImageContext(rect.size); CGContextRef context = UIGraphicsGetCurrentContext(); CGContextSetFillColorWithColor(context, [UIColor yellowColor].CGColor); CGContextFillRect(context, rect); UIImage *image = UIGraphicsGetImageFromCurrentImageContext(); UIGraphicsEndImageContext(); //--- 拍扁 拍扁 --- [[UINavigationBar appearance] setBackgroundImage:image forBarMetrics:UIBarMetricsDefault]; [[UITabBar appearance] setBackgroundImage:image]; |
iOS6拍扁后的效果图

我们看一下,iOS6中拍扁之后的效果,客观您按需索取吧。总的来说,后面的方法更加扁平。在iOS7中的效果是一样的,您随意选择。
3.在iOS7下所有的UIBar还有毛玻璃效果,属性为translucent
NavigationBar禁用毛玻璃效果:
1 | self.navigationController.navigationBar.translucent = NO; |
TabBar禁用毛玻璃效果:
1 | self.tabBarController.tabBar.translucent = NO; |
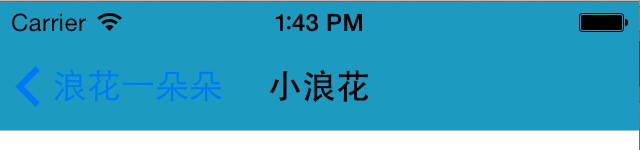
UINavigationBar
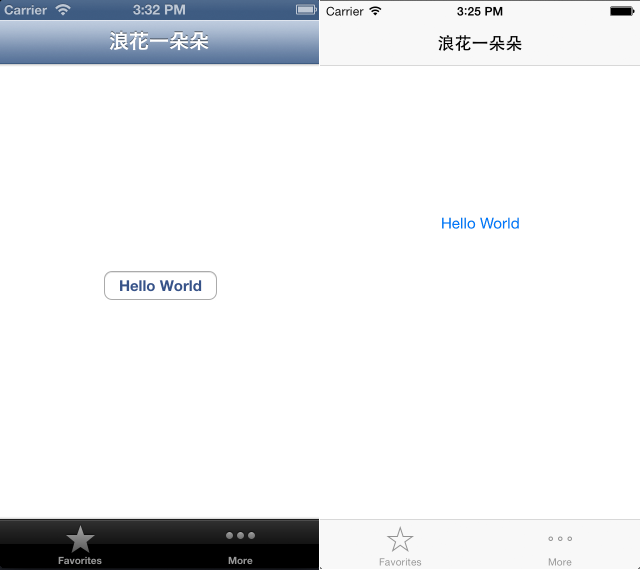
我们来看iOS6与iOS7之间,导航栏的区别,如图:
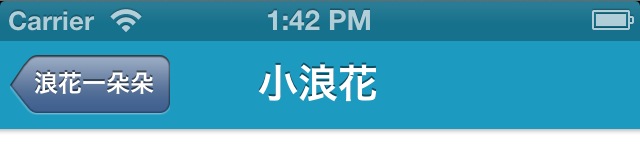
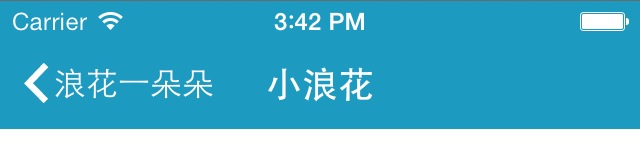
1.首先,我们来解决Back按钮的问题
1 2 3 4 5 6 7 8 9 10 11 12 13 14 15 16 17 18 19 20 21 22 23 24 25 26 27 | //--- 统一设置UIBarButtonItem的文字属性,包括返回按钮 --- NSDictionary *titleAttributes = @{UITextAttributeFont: [UIFont systemFontOfSize:16], UITextAttributeTextColor: [UIColor whiteColor] }; [[UIBarButtonItem appearance] setTitleTextAttributes:titleAttributes forState:UIControlStateNormal]; //设置图片拉升的区域,根据需要自己设置 UIEdgeInsets edgeInsets = UIEdgeInsetsMake(0, 18, 0, 0); UIImage *backImage = [[UIImage imageNamed:@"back"] resizableImageWithCapInsets:edgeInsets]; [[UIBarButtonItem appearance] setBackButtonBackgroundImage:backImage forState:UIControlStateNormal barMetrics:UIBarMetricsDefault]; //----- 按照系统版本 设置返回按钮 ----- if (NSFoundationVersionNumber > NSFoundationVersionNumber_iOS_6_1) { //设置返回按钮文字的位置,根据需要自己设置 [[UIBarButtonItem appearance] setBackButtonTitlePositionAdjustment:UIOffsetMake(-5, 0) forBarMetrics:UIBarMetricsDefault]; } else { //设置返回按钮文字的位置,根据需要自己设置 [[UIBarButtonItem appearance] setBackButtonTitlePositionAdjustment:UIOffsetMake(3, 1) forBarMetrics:UIBarMetricsDefault]; } |
测试结果,在模拟环境下iOS7中有点问题,第一次push的时候,back按钮箭头不可见,在真机上没问题。
在iOS7环境下,还有另外一个方法能设置返回按钮
1 2 3 4 | UIImage *backImage = [UIImage imageNamed:@"back"]; [[UINavigationBar appearance] setBackIndicatorImage:backImage]; [[UINavigationBar appearance] setBackIndicatorTransitionMaskImage:backImage]; |
2.然后,我们来解决NavigationBar的title
1 2 3 4 | NSDictionary *navTitleAttributes = @{NSForegroundColorAttributeName: [UIColor whiteColor], NSFontAttributeName: [UIFont boldSystemFontOfSize:18]}; [[UINavigationBar appearance] setTitleTextAttributes:navTitleAttributes]; |
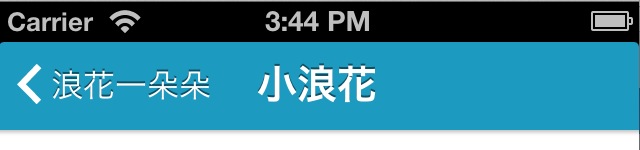
3.最后,来设置一下状态栏
1 | [[UINavigationBar appearance] setBarStyle:UIBarStyleBlack]; |
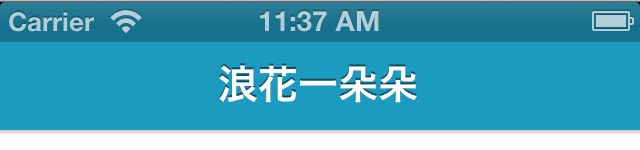
OK,看一下,设置完后的效果:
UITabBar
针对UITabBar,它的拍扁问题,在前面已经解决了,下面我们再看几个问题。
1.设置图标与文本
1 2 3 | vc.tabBarItem.title = @"我的客厅"; vc.tabBarItem.image = [UIImage imageNamed:@"icon_home_nm"]; vc.tabBarItem.selectedImage = [UIImage imageNamed:@"icon_home_hl"]; |
2.设置文字与图标之间的距离
1 | vc.tabBarItem.titlePositionAdjustment = UIOffsetMake(0, -3); |
3.设置角标
1 | vc.tabBarItem.badgeValue = @"5"; |
我们来看一下效果:


UITableview
1.关于原点
iOS7系统下,原点在屏幕的左上角,但是我们给UITableview的原点设置成{0,0}时,又感觉它的原点在{0, 64}的位置呢?是因为iOS7下,ViewController有一个automaticallyAdjustsScrollViewInsets属性,默认为YES。
1 | self.automaticallyAdjustsScrollViewInsets = NO; |
假如UINavigationBar的毛玻璃效果设置成NO,也能打到相同的效果
1 | self.navigationController.navigationBar.translucent = NO; |
2.cell的选中效果
很多时候都需要用到自定义的cell,cell选中的效果也需要自定义。
如果给cell的中加一个Button,来体现点击的效果,就感觉比较low了,关键效果也不乐观。使用系统自带的cell的Selected效果感觉就比较好了。
1 2 3 4 5 6 | //selectedView可以设置圆角,大小等 UIView *selectedView = [UIView alloc] init]; selectedView.backgroundColor = [UIColor lightGrayColor]; //self为cell self.selectedBackgroundView = selectBgView; |
3.cell的分割线
UITableviewCell自带的分割线,基本上无法满足设计师的要求,所以我们还需要自己来画一条分割线。
1 2 3 | UIView *sepLine = [UIView alloc] initWithFrame:frame]; sepLine.backgroundColor = [UIColor lightGrayColor]; [cell addSubview:sepLine]; |
添加完分割线后,发现选中时分割线不见了。我们可以用另外一种方式:
1 2 3 4 5 6 7 8 9 10 11 12 13 14 15 | //--- 创建一张图片 --- CGRect rect = CGRectMake(0, 0, 1, 1); UIGraphicsBeginImageContext(rect.size); CGContextRef context = UIGraphicsGetCurrentContext(); CGContextSetFillColorWithColor(context, [UIColor yellowColor].CGColor); CGContextFillRect(context, rect); UIImage *image = UIGraphicsGetImageFromCurrentImageContext(); UIGraphicsEndImageContext(); //设置分割线 UIImageView *lineImgv = [[UIImageView alloc] initWithFrame:frame]; lineImgv.image = image; [cell addSubview:lineImgv]; |
这里以分割线为例,其他设置成背景色的情况也是一样的。
文本
我们有时候需要实现这样的需求:对文本中的部分文字改变样式(加粗、改变字体大小、改变文字颜色);文本需要识别手机号码、邮箱;文本前面几个字不可编辑等等。
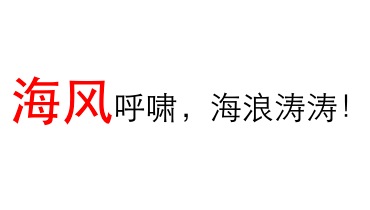
1.对文本中的部分文字改变样式
1 2 3 4 5 6 7 8 9 | NSString *string = @"海风呼啸,海浪涛涛!"; NSDictionary *attributes = @{NSFontAttributeName: [UIFont boldSystemFontOfSize:16], NSForegroundColorAttributeName: [UIColor redColor]}; NSMutableAttributedString *attributeString = [[NSMutableAttributedString alloc] initWithString:string]; [attributeString setAttributes:attributes range:NSMakeRange(0, 2)]; label.attributedText = attributeString; |
NSMutableAttributedString对象的Attributes对象是NSDictionary类型,它的key可以在UIKit中的NSAttributedString.h文件中找,按需所取。
这里以UILabel为例,UITextView也有attributedText属性。
效果如图:
2.文本需要识别手机号码、邮箱
1 | textView.dataDetectorTypes = UIDataDetectorTypeAll; |
通过设置这个属性,就能自动识别手机号码、日期、链接了。
3.文本前面几个字不可编辑
应用场景:回复某条信息的时候,往往会有个前缀“回复xxx:”,但是这段如果不特殊处理,用户很容易误操作把它删掉,我们从程序上保证前缀的这几个文字不能被删掉。
我们需要实现一个UITextView的委托。
1 2 3 4 5 6 7 8 9 | - (BOOL)textView:(UITextView *)textView shouldChangeTextInRange:(NSRange)range replacementText:(NSString *)text { if (range.location < 6) //位置的大小,根据需要自己设置 { return NO; } return YES; } |
键盘
有时候键盘上面需要加一条,完成诸如隐藏键盘等功能,如图:
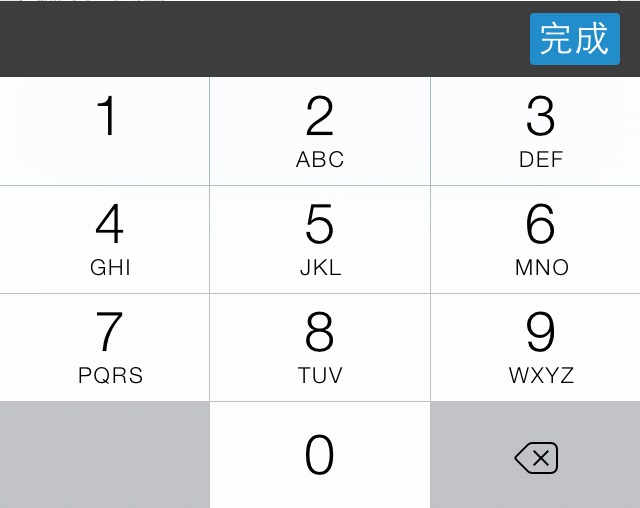
这里需要用到UITextView/UITextField的一个属性inputAccessoryView
1 2 3 4 5 6 | //此View自行玩弄
UIView *accessoryView = [[UIView alloc] init];
...
//关键是这句
textField.inputAccessoryView = accessoryView;
|